Building a CRUD application with Laravel
Building a CRUD application with Laravel
CRUD stands for Create, Read, Update, and Delete which are the four fundamental operations performed on database records in software applications. The term originated in computer science, more specifically within database management, as a shorthand to describe these core interactions with persistent data.
- Create: Adding new records to the database.
- Read: Retrieving or displaying records from the database.
- Update: Modifying existing records in the database.
- Delete: Removing records from the database.
Databases did it first
The term is tied to relational databases, but has been adopted by software developers as a shorthand way to describe common, often the most basic, functionality of an application.
Laravel isn’t special in regards to CRUD, but with Eloquent ORM (Object Relational Mapping), you are given the ability to work with relationalal databases using PHP rather than learning SQL for example.
A relational database table is represented by a Model in Eloquent, a Model allows the table to be represented as a PHP Class, each Model instance corresponds to a row in the database.
$post = new Post;
$post->title = "My First Blog Post";
$post->save();  // Saves it to the 'posts' table
Eloquent simplifies working with relationships between tables. Common relationships like one-to-many, many-to-many, and one-to-one are easily defined within Models. For example, if a blog-post has many comments, you can define this relationship in the Post model:
class Post extends Model {
    public function comments() {
        return $this->hasMany(Comment::class);
    }
}
Laravel 11
Laravel 11 continues to support and enhance CRUD functionalities with the following key components:
- Controllers: Handle HTTP requests and direct traffic to appropriate resources for creating, reading, updating, or deleting records.
- Eloquent Models: Manage database tables and provide an easy interface for CRUD operations. You interact with tables as if you’re dealing with PHP objects.
- Migrations: Allow you to define database schemas and changes to them, making it easier to manage the structure of your data tables.
- Routes: Define endpoints that map HTTP verbs (like GET, POST, PUT, DELETE) to specific actions in the controllers to perform CRUD operations.
For example, in Laravel 11, you might create a simple CRUD for a “Post” model where users can create blog posts, view them, update the content, or delete posts. The framework simplifies the process by automatically generating boilerplate code for you using commands like php artisan make:model Post -mcr (which generates a model, migration, and controller with resource methods ready to implement CRUD).
Let’s build something
Setup the project, change directory into your new project and then create some of the basics:
composer create-project laravel/laravel laravel-crud-example

cd laravel-crud-example

php artisan make:model Post -mcr

Database
We need to define the database, now some of the work has already been done for us in this case, but we can make changes. Look for this file: ./database/migrations/xxxx_xx_xx_create_posts_table.php (xxxx_xx_xx = Date format as YYYY-MM-DD). To begin, we have the following:
    public function up(): void
    {
        Schema::create('posts', function (Blueprint $table) {
            $table->id();
            $table->timestamps();
        });
    }
We will add to this:
Schema::create('posts', function (Blueprint $table) {
    $table->id();
    $table->timestamps();
    $table->string('title');
    $table->text('content');
});
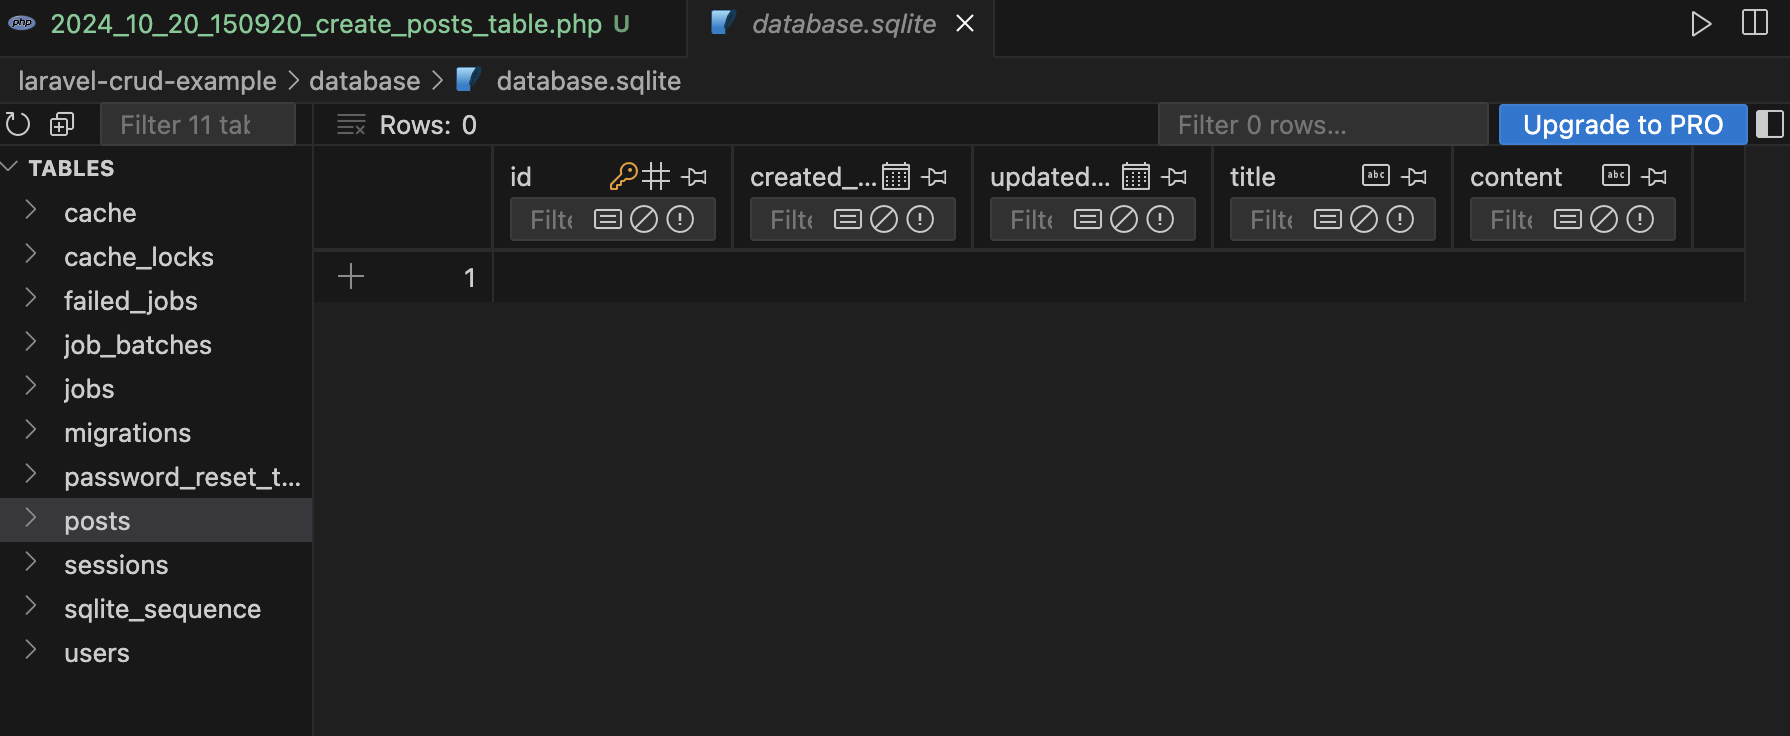
We create the table php artisan migrate. In this case, we’re using SQLite, so a new table will appear in your database.sqlite file.

Model
The Post model (./app/Models/post.php) was created for us, but we can add to this.
<?php

namespace App\Models;

use Illuminate\Database\Eloquent\Model;

class Post extends Model
{
    // this is empty by default
    protected $fillable = ['title', 'content'];
}
What we’re saying above is that these elements can be written in a single pass, rather than one at a time, we call this Mass Assignment.
Mass assignment in Laravel refers to the practice of passing an array of data directly to the create or update methods on an Eloquent model to save multiple fields at once, instead of setting each attribute individually.
Building Routes
We need a route for each of our CRUD operations, look here ./routes/web.php:
<?php

use Illuminate\Support\Facades\Route;
use App\Http\Controllers\PostController; // this is a new line

Route::get('/', function () {
    return view('welcome');
});

Route::resource('posts', PostController::class); // this is a new line
The new lines related to PostController automatically sets up the following routes for CRUD:
GET /posts (index)
GET /posts/create (create)
POST /posts (store)
GET /posts/{post} (show)
GET /posts/{post}/edit (edit)
PUT /posts/{post} (update)
DELETE /posts/{post} (destroy)
If you follow any of those links right now, you won’t see a lot, but the route is there all the same.
What is the PostController?
We sort of got ahead of ourselves there, we’re calling something (PostController), it has been created, but what is it doing?
This file was one of the outputs from that command we ran earlier (php artisan make:model Post -mcr). This command does three things:
-m: Creates a migration file for the Post model.
-c: Generates a controller for the Post model.
-r: Specifies that the controller should be a resource controller, which automatically includes methods for common CRUD actions.
The file is found here: app/Http/Controllers/PostController.php and the role of this file is responsibility for handling the logic between user requests and the application. Specifically, it determines what happens when a user accesses a particular URL.
If you looked at that file now, there’s stuff there, but it basically does nothing, let’s fix that.
PostController.php [Click to expand]
<?php

namespace App\Http\Controllers;

use App\Models\Post;
use Illuminate\Http\Request;

class PostController extends Controller
{
    /**
     * Display a listing of the resource.
     */
    public function index()
    {
        $posts = Post::all();
        return view('posts.index', compact('posts'));
    }

    /**
     * Show the form for creating a new resource.
     */
    public function create()
    {
        return view ('posts.create');
    }

    /**
     * Store a newly created resource in storage.
     */
    public function store(Request $request)
    {
        $validated = $request->validate([
            'title' => 'required|max:255',
            'content' => 'required',
        ]);

        Post::create($validated);
        return redirect()->route('posts.index')->with('success', 'Post created successfully.');
    }

    /**
     * Display the specified resource.
     */
    public function show(Post $post)
    {
        return view('posts.show', compact('post'));
    }

    /**
     * Show the form for editing the specified resource.
     */
    public function edit(Post $post)
    {
        return view('posts.edit', compact('post'));
    }

    /**
     * Update the specified resource in storage.
     */
    public function update(Request $request, Post $post)
    {
        $validated = $request->validate([
            'title' => 'required|max:255',
            'content' => 'required'
        ]);
    }

    /**
     * Remove the specified resource from storage.
     */
    public function destroy(Post $post)
    {
        $post->delete();
        return redirect()->route('posts.index')->with('success', 'Post deleted successfully');
    }
}
Views
Views are what we want people to see, this is where we can start to make it look pretty, if we want. I won’t spend time on making it pretty here, instead focusing on the process.
We need to create views here resources/views/posts (posts) is a new directory for this purpose. We need to build a view for each; index, create, edit, show.
index.blade.php
@extends('layout')

@section('content')
    <h1>Posts</h1>
    <a href="{{ route('posts.create') }}">Create New Post</a>

    @foreach ($posts as $post)
        <div>
            <h2><a href="{{ route('posts.show', $post->id) }}">{{ $post->title }}</a></h2>
            <a href="{{ route('posts.edit', $post->id) }}">Edit</a>

            <form action="{{ route('posts.destroy', $post->id) }}" method="POST" style="display: inline;">
                @csrf
                @method('DELETE')
                <button type="submit">Delete</button>
            </form>
        </div>
    @endforeach
@endsection
create.blade.php
@extends('layout')

@section('content')
    <h1>Create Post</h1>

    <form action="{{ route('posts.store') }}" method="POST">
        @csrf
        <label for="title">Title:</label>
        <input type="text" name="title" required>

        <label for="content">Content:</label>
        <textarea name="content" required></textarea>

        <button type="submit">Submit</button>
    </form>
@endsection
edit.blade.php
@extends('layout')

@section('content')
    <h1>Edit Post</h1>

    <form action="{{ route('posts.update', $post->id) }}" method="POST">
        @csrf
        @method('PUT')

        <label for="title">Title:</label>
        <input type="text" name="title" value="{{ $post->title }}" required>

        <label for="content">Content:</label>
        <textarea name="content" required>{{ $post->content }}</textarea>

        <button type="submit">Update</button>
    </form>
@endsection
show.blade.php
<!DOCTYPE html>
<html>
<head>
    <title>Laravel CRUD</title>
</head>
<body>
    <div class="container">
        @yield('content')
    </div>
</body>
</html>
The layout file
We can start to consider something like a template file that may hold our overall styling, for example, we inported the layout file, indeed we need to create that file ./resources/views/layout.blade.php:
<!DOCTYPE html>
<html>
<head>
    <title>Laravel CRUD Example</title>
</head>
<body>
    <div class="container">
        @yield('content')
    </div>
</body>
</html>
Testing the CRUD app
Okay, it isn’t pretty, but it was just to show the CRUD basics. I use Laravel Herd on my machine, but if you don’t, you can use artisan to serve you a demo:
php artisan serve
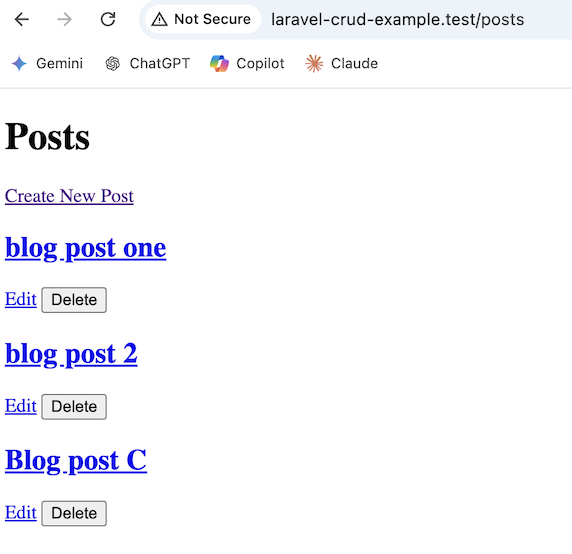
You will be told the URL to go to, for people with Laravel Herd (which I recommend), you should be able to open a browser and type the name of your project followed by .test as in laravel-crud-example.test:

Finishing up
I’m going to end here, the purpose of this post was to talk about CRUD functionality and to go through one of the routes to creating a really simple web application that can easily demonstrate typical CRUD functionality.
GitHub Repo
If you want to dig deeper but would like an easy starting place, then there is a GitHub repo that contains the code from this blog post, find it HERE.
